Owning an RV opens the door to weekend getaways, family vacations and spontaneous road trips. But it also comes with a responsibility that can be easy to overlook: keeping everything in good working condition, even when you’re not traveling.
Unlike a car you drive every day, an RV might sit for weeks or months between adventures. During that time, tires age, batteries lose their charge, seals deteriorate and small mechanical problems can develop unnoticed.
The good news? Many expensive RV repairs can be avoided with regular inspections and a little preventive maintenance.
Whether you’re preparing for a weekend at Lake Texoma or planning a longer trip across Texas, these 10 RV maintenance tips can help protect your investment, reduce unexpected expenses and keep you safely on the road.
- Inspect Your RV Tires Before Every Trip
Your RV’s tires are among its most important safety components, yet they’re often overlooked until something goes wrong.
Unlike everyday passenger vehicles, RVs may accumulate relatively few miles each year. That doesn’t mean their tires aren’t aging. Exposure to sunlight, temperature changes, extended storage and improper inflation can all contribute to deterioration.
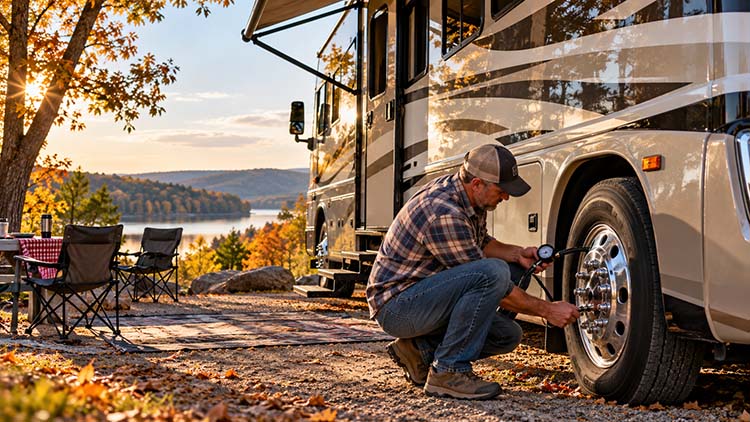
Before each trip, inspect your tires for visible cracking, bulges, cuts, uneven wear and embedded objects. Check tire pressure when the tires are cold, using the RV or tire manufacturer’s specifications for your particular vehicle and load.
Pay attention to tire age, too. The National Highway Traffic Safety Administration notes that some vehicle and tire manufacturers recommend replacement after six to ten years, regardless of tread depth. You can determine a tire’s manufacturing date from the last four digits of its DOT identification number.
For additional guidance, see the NHTSA Tire Safety Guide.
Money-saving tip: Don’t wait for a blowout to replace questionable tires. A failed tire can damage an RV’s wheel wells, body panels, plumbing and other components, turning a tire replacement into a much larger repair bill.
RV tires can also be expensive, particularly when replacing several at once. When shopping for replacements, compare prices and brands, but make sure any tire you purchase meets the required size, load capacity and other specifications.
For Stover Creek customers in the Celina area, Hamm’s Tires in Lewisville is one local option to consider when comparing reasonably priced new tires and tire services. Located at 1017 Fox Avenue in Lewisville, they offer a variety of tire brands, balancing and alignment services. Call ahead to confirm availability and whether they can accommodate your particular RV or trailer.
- Keep Your RV Batteries Charged and Connections Clean
Few things can derail an RV getaway faster than discovering a dead battery when you’re ready to leave.
Most motorhomes have two battery systems: a chassis battery for starting the engine and house batteries that power interior equipment. Travel trailers typically rely on house batteries along with the tow vehicle’s electrical system.
Even when an RV isn’t being used, electronics, detectors and other components may continue drawing power.
To help extend battery life, inspect terminals for corrosion, make sure connections are secure and check the charge regularly. Use an appropriate battery maintainer when recommended by the manufacturer.
Different battery chemistries require different storage practices. Lead-acid, AGM and lithium batteries shouldn’t automatically be treated the same way, especially during long periods of inactivity or extreme temperatures.
Money-saving tip: Proper charging and storage practices can help avoid premature battery replacement. Follow the battery manufacturer’s instructions rather than assuming that leaving every battery connected to a charger indefinitely is best.
For more information about what happens when an RV sits unused, see our RV and Boat Storage & Maintenance Guide.
- Pay Attention to Brakes, Suspension and Wheel Bearings
An RV places significant demands on its braking and suspension systems, particularly when carrying passengers, supplies, water and recreational equipment.
Before a trip, pay attention to unusual noises, vibration, pulling to one side or changes in braking performance.
Travel trailer owners should also follow the manufacturer’s recommended schedule for inspecting brakes and servicing wheel bearings. A neglected bearing can overheat or fail, potentially leaving you stranded far from home.
Uneven tire wear may also indicate a suspension or alignment problem. Simply replacing the tires without addressing the underlying issue can mean spending money on another set sooner than necessary.
For an explanation of how alignment affects tire life and vehicle handling, see this guide to wheel alignment and tire wear.
Money-saving tip: If you notice unusual tire wear, vibration or handling problems, have them inspected promptly. Early repairs are often less expensive than replacing damaged tires or suspension components.
- Stay Current on Engine Oil, Coolant and Other Fluids
Motorhome owners need to pay attention to the same basic mechanical maintenance as other vehicle owners, including oil changes, coolant, transmission fluid, brake fluid and other manufacturer-specified services.
One common mistake is assuming that low mileage means maintenance can wait.
Many maintenance schedules are based on both mileage and time. Fluids can deteriorate, absorb moisture or lose effectiveness even when a vehicle isn’t driven frequently.
Check fluid levels before traveling, look for signs of leaks underneath the RV and follow the manufacturer’s recommended maintenance intervals.
For travel trailer owners, this same principle applies to the tow vehicle. Your truck or SUV may work considerably harder when towing several thousand pounds than it does during everyday driving.
Money-saving tip: Keep a simple maintenance record showing dates, mileage and completed services. It’s much easier to stay ahead of scheduled maintenance when you don’t have to remember when something was last done.
- Inspect Roof Seals, Windows and Exterior Caulking
Water damage is one of the most expensive problems an RV owner can face, and it often begins with something relatively small.
A deteriorating roof seal, cracked caulking around a window or loose exterior fitting can allow moisture into walls, ceilings and flooring.
By the time a stain or soft spot becomes visible inside the RV, the underlying damage may already be extensive.
Inspect roof seams, vents, skylights, windows, doors and exterior penetrations regularly. Look for cracking, separation, loose sealant and signs of moisture.
Use only sealants compatible with your RV’s roof and exterior materials, and follow the manufacturer’s recommendations. If you’re uncomfortable working on the roof, have a qualified RV technician perform the inspection.
North Texas weather adds another challenge. Prolonged heat, intense sunlight and sudden storms can accelerate wear on exterior materials.
Our article, What Extreme Texas Heat Is Really Doing to Your RV or Boat, explains why this deserves particular attention.
Money-saving tip: A relatively inexpensive seal inspection and repair may help prevent thousands of dollars in water damage.
- Maintain Your RV’s Freshwater and Wastewater Systems
An RV’s plumbing system needs attention even when the vehicle isn’t being used.
Freshwater tanks and plumbing should be sanitized according to the manufacturer’s recommendations. Check visible hoses, fittings and connections for leaks, and make sure the water pump operates properly.
Gray and black water tanks should be emptied and maintained using appropriate RV sanitation procedures.
Don’t forget the water heater, exterior shower, toilet seals and other plumbing components that may be overlooked during a quick inspection.
If freezing temperatures are expected, follow the RV manufacturer’s winterization procedures. North Texas may not experience the prolonged cold of northern states, but a hard freeze can still damage unprotected plumbing.
Money-saving tip: Small leaks and neglected plumbing connections can cause damage to cabinets, flooring and interior walls. A quick inspection before and after each trip can help catch problems early.
- Exercise and Service Your RV Generator
If your RV has an onboard generator, don’t assume it’s ready simply because it worked the last time you used it.
Generators that sit unused for extended periods can develop fuel-related problems, battery issues and other maintenance concerns.
Many manufacturers recommend periodically operating generators under an appropriate electrical load, but the frequency and procedure depend on the specific model.
Check the generator’s oil level, maintenance schedule, fuel requirements and operating instructions. Never run a generator inside an enclosed storage unit, garage or other poorly ventilated area because of the risk of carbon monoxide poisoning.
If your generator is difficult to start, surges under load or shuts down unexpectedly, investigate the problem before your next trip.
Money-saving tip: Routine generator maintenance is generally much less expensive than repairing fuel-system problems or replacing neglected components.
- Inspect Propane and Electrical Systems
Your RV’s propane and electrical systems power many of the conveniences that make camping enjoyable, including cooking, refrigeration, heating and air conditioning.
Before traveling, inspect visible propane hoses and connections for damage, check that cylinders are properly secured and verify that propane, smoke and carbon monoxide detectors are functioning and within their service life.
Never use an open flame to check for propane leaks. If you suspect a leak, shut off the supply when safe, avoid ignition sources and have the system inspected by a qualified professional.
Electrical maintenance deserves equal attention. Look for damaged shore-power cords, loose plugs, signs of overheating and malfunctioning outlets.
High-demand equipment such as air conditioners can place substantial loads on an RV’s electrical system, particularly during Texas summers.
Money-saving tip: Replacing a damaged cord or addressing an electrical problem early may prevent more expensive equipment damage and reduce fire risk.
- Protect Your RV From Pests, Moisture and Long-Term Storage Damage
An RV that sits unused can become an inviting place for insects, rodents and moisture-related problems.
Rodents may chew wiring, insulation and hoses. Insects can find their way into compartments and vents. Moisture buildup can lead to unpleasant odors, mildew and damage to interior materials.
Before storing your RV, remove perishable food, clean cooking areas and inspect exterior openings for potential entry points.
Use appropriate pest barriers without blocking necessary ventilation, and check the interior periodically for signs of activity or moisture.
It’s also wise to inspect the RV after heavy rain or severe weather, particularly if it’s stored outdoors.
Choosing the right storage arrangement can help reduce exposure to some of these conditions. Depending on your RV and budget, covered, three-sided or enclosed storage may offer additional protection from sun, rain and other elements.
Money-saving tip: A clean, regularly inspected RV is less likely to develop problems that go unnoticed for months.
- Make a Pre-Trip Walkaround Part of Every Adventure
Even well-maintained RVs benefit from one final inspection before hitting the road.
A pre-trip walkaround takes relatively little time and can help prevent everything from minor inconveniences to serious roadside emergencies.
Check that tires are properly inflated, lights are working, exterior compartments are secured and awnings are fully retracted.
For travel trailers, inspect the hitch connection, safety chains, breakaway cable and trailer electrical connection. Confirm that the trailer is properly coupled and that its brakes and lights operate correctly.
Inside the RV, secure loose items, close cabinets, latch appliances and make sure everything is ready for travel.
Don’t forget to check the weather along your route, confirm campground reservations and make sure your roadside assistance coverage is current.
Money-saving tip: Catching a loose compartment door, improperly secured awning or trailer connection problem before leaving can save significant money and frustration later.
Quick RV Maintenance Checklist Before Your Next Trip
Use this as a starting point, along with the inspection requirements in your RV’s owner’s manual.
- Inspect tires for damage, age and proper cold inflation pressure.
- Check batteries and electrical connections.
- Inspect brakes, suspension and wheel bearings as recommended.
- Check engine fluids and look for leaks.
- Examine roof seams, windows and exterior seals.
- Test the water pump and inspect plumbing connections.
- Check generator operation and maintenance.
- Test smoke, propane and carbon monoxide detectors.
- Look for signs of pests or moisture.
- Check lights, hitch connections, awnings and exterior compartments.
How Proper RV Storage Supports Preventive Maintenance
Regular maintenance is essential, but where and how you store your RV also matters.
Extended exposure to sunlight, storms and changing temperatures can contribute to wear on tires, seals, exterior finishes and other components.
At Stover Creek Storage in Celina, Texas, RV owners can choose from outdoor, canopy, three-sided and enclosed storage options based on their vehicle and storage needs.
Convenient access also makes it easier to retrieve your RV, perform routine inspections and prepare for upcoming trips.
Storage doesn’t replace maintenance, but the right combination of regular care and appropriate storage can help protect your investment between adventures.
A Little Maintenance Goes a Long Way
RV ownership should be about making memories, exploring new places and enjoying time away, not worrying about unexpected repair bills.
Fortunately, many common RV problems are preventable. Regular tire inspections, battery care, roof maintenance, mechanical servicing and pre-trip checks can help keep small issues from turning into expensive repairs.
You don’t have to tackle everything in one weekend. Start with a simple maintenance schedule, follow your manufacturer’s recommendations and address problems as soon as you notice them.
And once your RV is ready for the road, why not put it to good use? Check out our 7 Fall RV Getaways Near Dallas-Fort Worth for some inspiration.
After the adventure, Stover Creek Storage is here to help you keep your RV ready for the next one.